Running the Post Reconciliation Gross Error Analysis
You can execute the Post Reconciliation Gross Error Analysis as a post-validation step of a mass- or volume-based balance. This section uses the Mass Balance as an example.
Note: While it is possible to configure the Post Reconciliation Gross Error Analysis Rule as a separate analysis from the Sigmafine balance, because the post reconciliation rules require reconciled data Attributes to have values, results are not meaningful without these values.
Configure a balance analysis that supports the Gross Error Analysis Rules to use the Post Reconciliation Gross Error Analysis. Refer to Post Reconciliation Gross Error Analysis Rules.
To configure the Analysis Rule case, follow the steps below using either the System Explorer or the Modeler:
Follow the steps under either System Explorer or Modeler.
In the Sigmafine Analyses navigation pane, select the Model analysis for which you are creating a case.
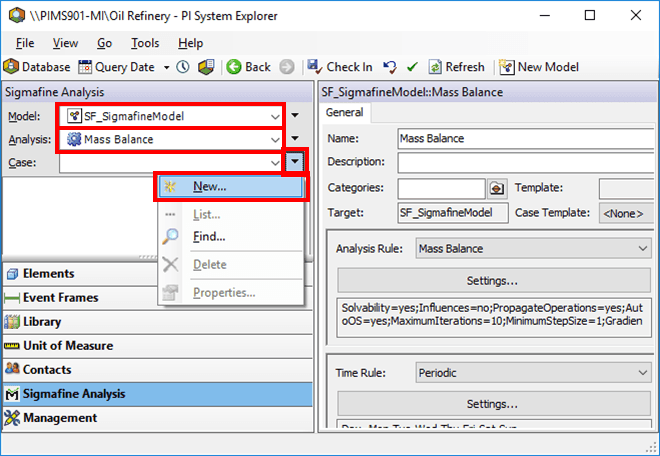
Click the Case
 menu button and select New.
In the display with the Model for which you configured an analysis:
- On the SF Analysis Toolbar, click the New Case button.

The Case Properties window opens.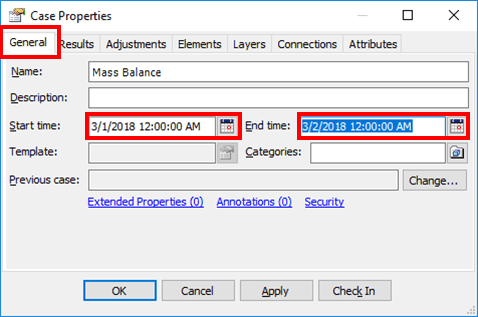
The time rule that you chose for the analysis has automatically filled in the Start time and End time boxes of the case.
In the Description box, type in a short description for the case.
If a previous Case exists, you can select it in the Previous Case box.
Select a previous Case if you made any specific choices for that case (selecting/deselecting layers, removing elements from the Case analysis, etc.) that you want to use in the new case. The default Case shown in the field is the Case created prior to the new case. If this is the first Case for an analysis rule, there is no previous case.
Change the Start time and End time as needed. Either type in a new time stamp or select a different time stamp by clicking the
 Calendar button.
Use the Case Runner to execute the analysis, as shown in the following image.

Case Runner options:
- Connect Elements: Establishes the elements to include in a case, based on their inclusion in any of the active layers of the case / display.
- Collect Transfers: Locates any transfers to include in a case, based on the transfers' time and whether it is connected to any elements in the case.
- Collect Inputs: Collect all inputs for the analysis to use in running the case.
- Run: Executes the selected General Gross Error Analysis rules on the collected inputs. Results are stored within the Case and are displayed on the Log tab. Notable Gross Errors also appear on the Log tab.
- Publish: Writes results for Attributes defined as output attributes.
- Review the Log (or Log Output) tab of the Case to see the results from the Gross Error analysis. Two log severity messages types can occur: warnings and errors. These are noted in the Severity column of the tab.
Warnings - are message that suggest minor errors have occurred.
Errors - are sever and must be corrected. Once corrected, the analysis must be re-calculated.
Note:
The messages on the log tab are only visible during the initial session running the case. They are stored in a temporary file located in the your temporary directory under [Model]_[Model Analysis]_log.csv, where [Model] is the name of the Model and [Model Analysis] is the name of the analysis in which the Model resides.
To save this log permanently, right-click on the log tab and select Save Log.
- To save the case, you must check it in.
- System Explorer: Click the
 Check In button.
 - ProcessBook Modeler: From the menu select File > AF Checkin.